
Cloning your team repository
Welcome to ConquerHack! This time, it's on!
To get started, you will need to clone your team's repository. This is where you will find the scaffolds we provide for you to write the bots. It is also where you will push your code to, so that we can run it during the tournament.
Prerequisites
- tools setup, in particular Git.
Setting up SSH key for Gitea
To clone your team's repository, you will need to authenticate with the Gitea instance. The recommended and most convenient way to do so is to set up an SSH key for your Gitea account. This way, you won't have to enter your username and password every time you interact with the repository.
Check if you already have an SSH key on your machine, and if not, generate one. Open a terminal and run:
bashls ~/.ssh/id_*.pubIf you see a file named
id_rsa.puborid_ed25519.pub, then you already have an SSH key. You can open the file to see the public key:bashcat ~/.ssh/id_rsa.pubIf you don't have an SSH key, you can generate one with the following command (replace
<email>with your email):bashssh-keygen -t ed25519 -C "<email>"Copy the contents of your public key file (the one ending in
.pub, e.g.id_ed25519.pub). You can print its contents in the terminal by running:bashcat ~/.ssh/id_ed25519.pubOr you can open it with a text editor and copy it from there.
Navigate to the ConquerHack Gitea instance.
Click on your profile picture in the top right corner and select
Settings.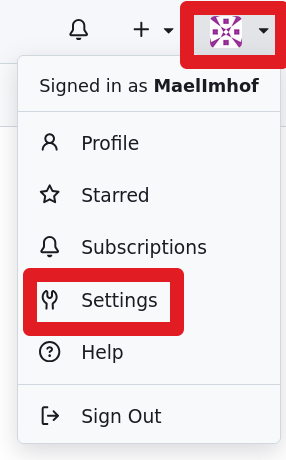
Select
SSH / GPG Keyson the left sidebar and then underManage SSH Keys, click onAdd Key.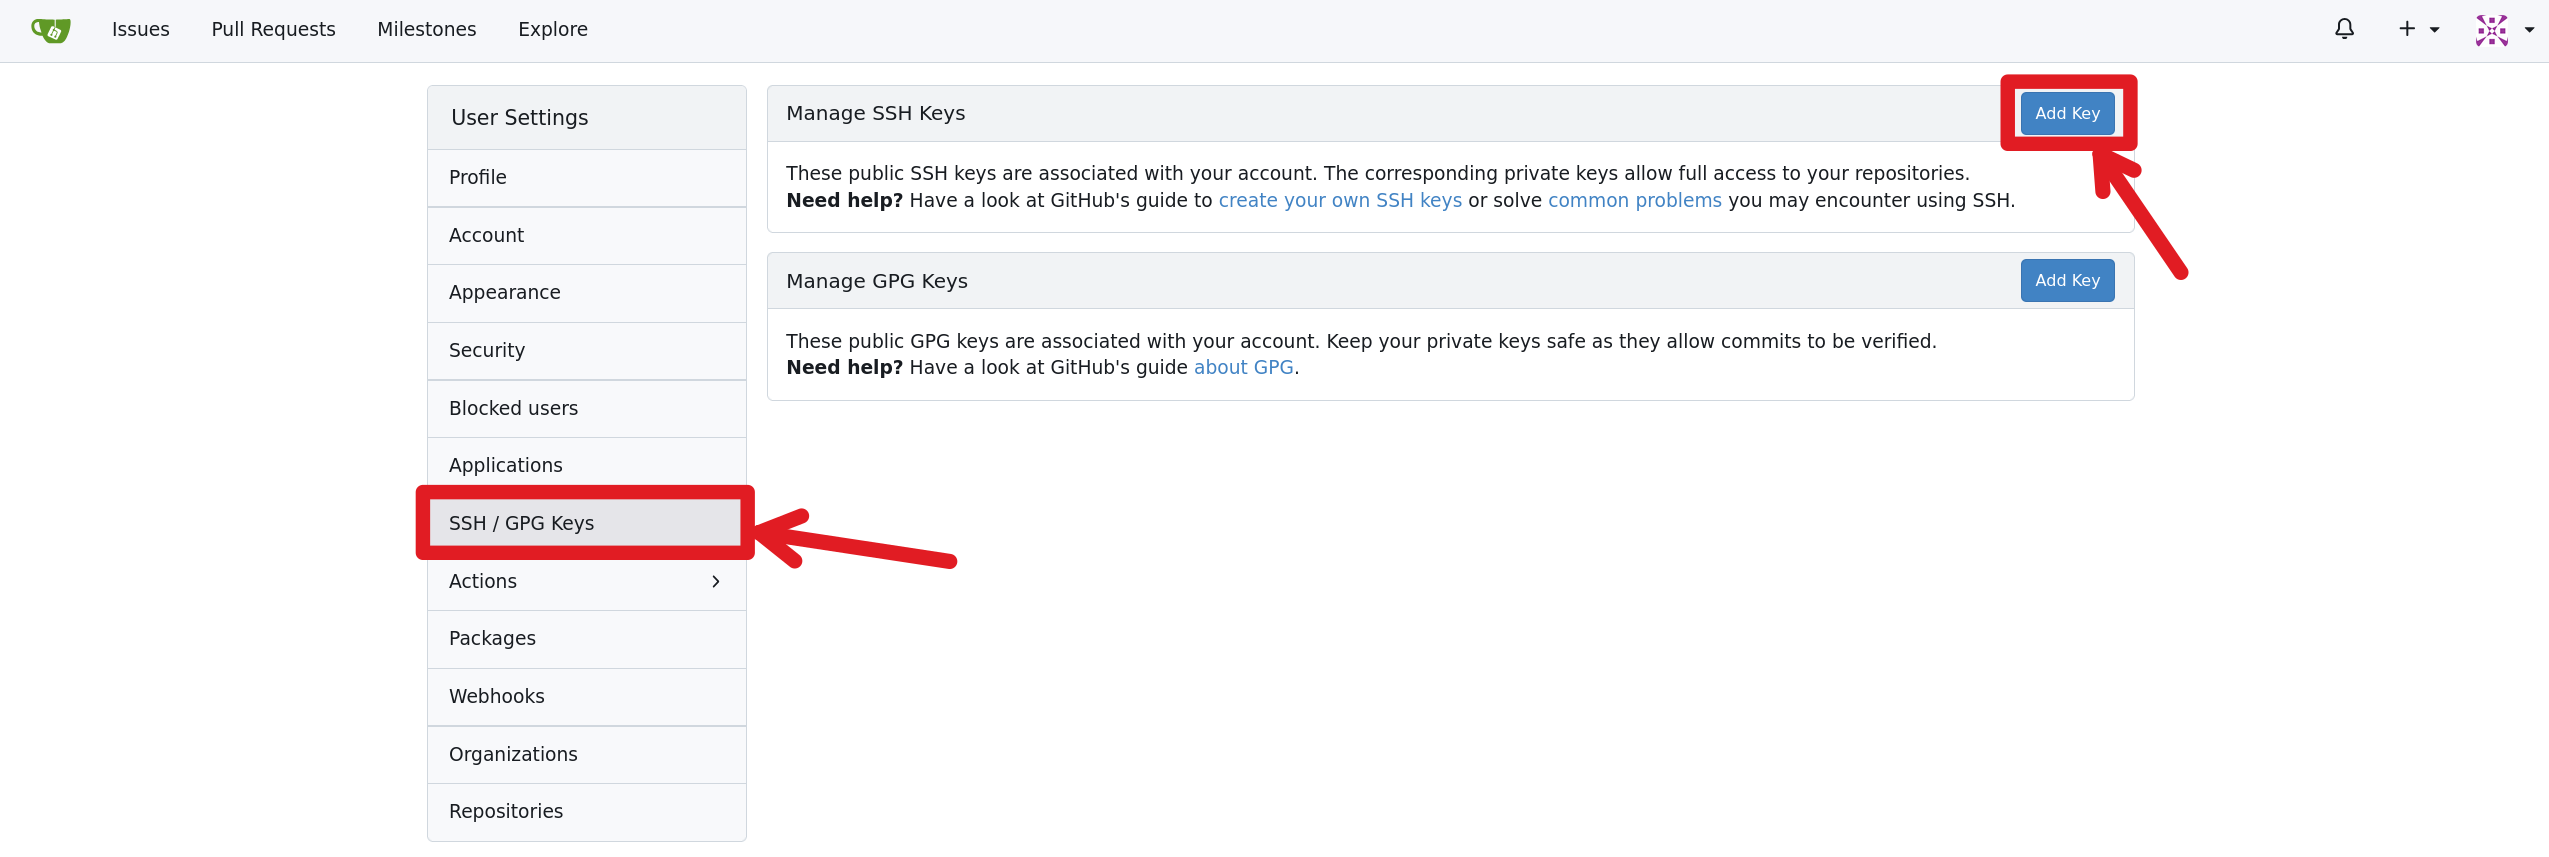
Give your key a name (e.g. "My Key") and paste the contents of your public key into the
Contentfield. Then click onAdd Key.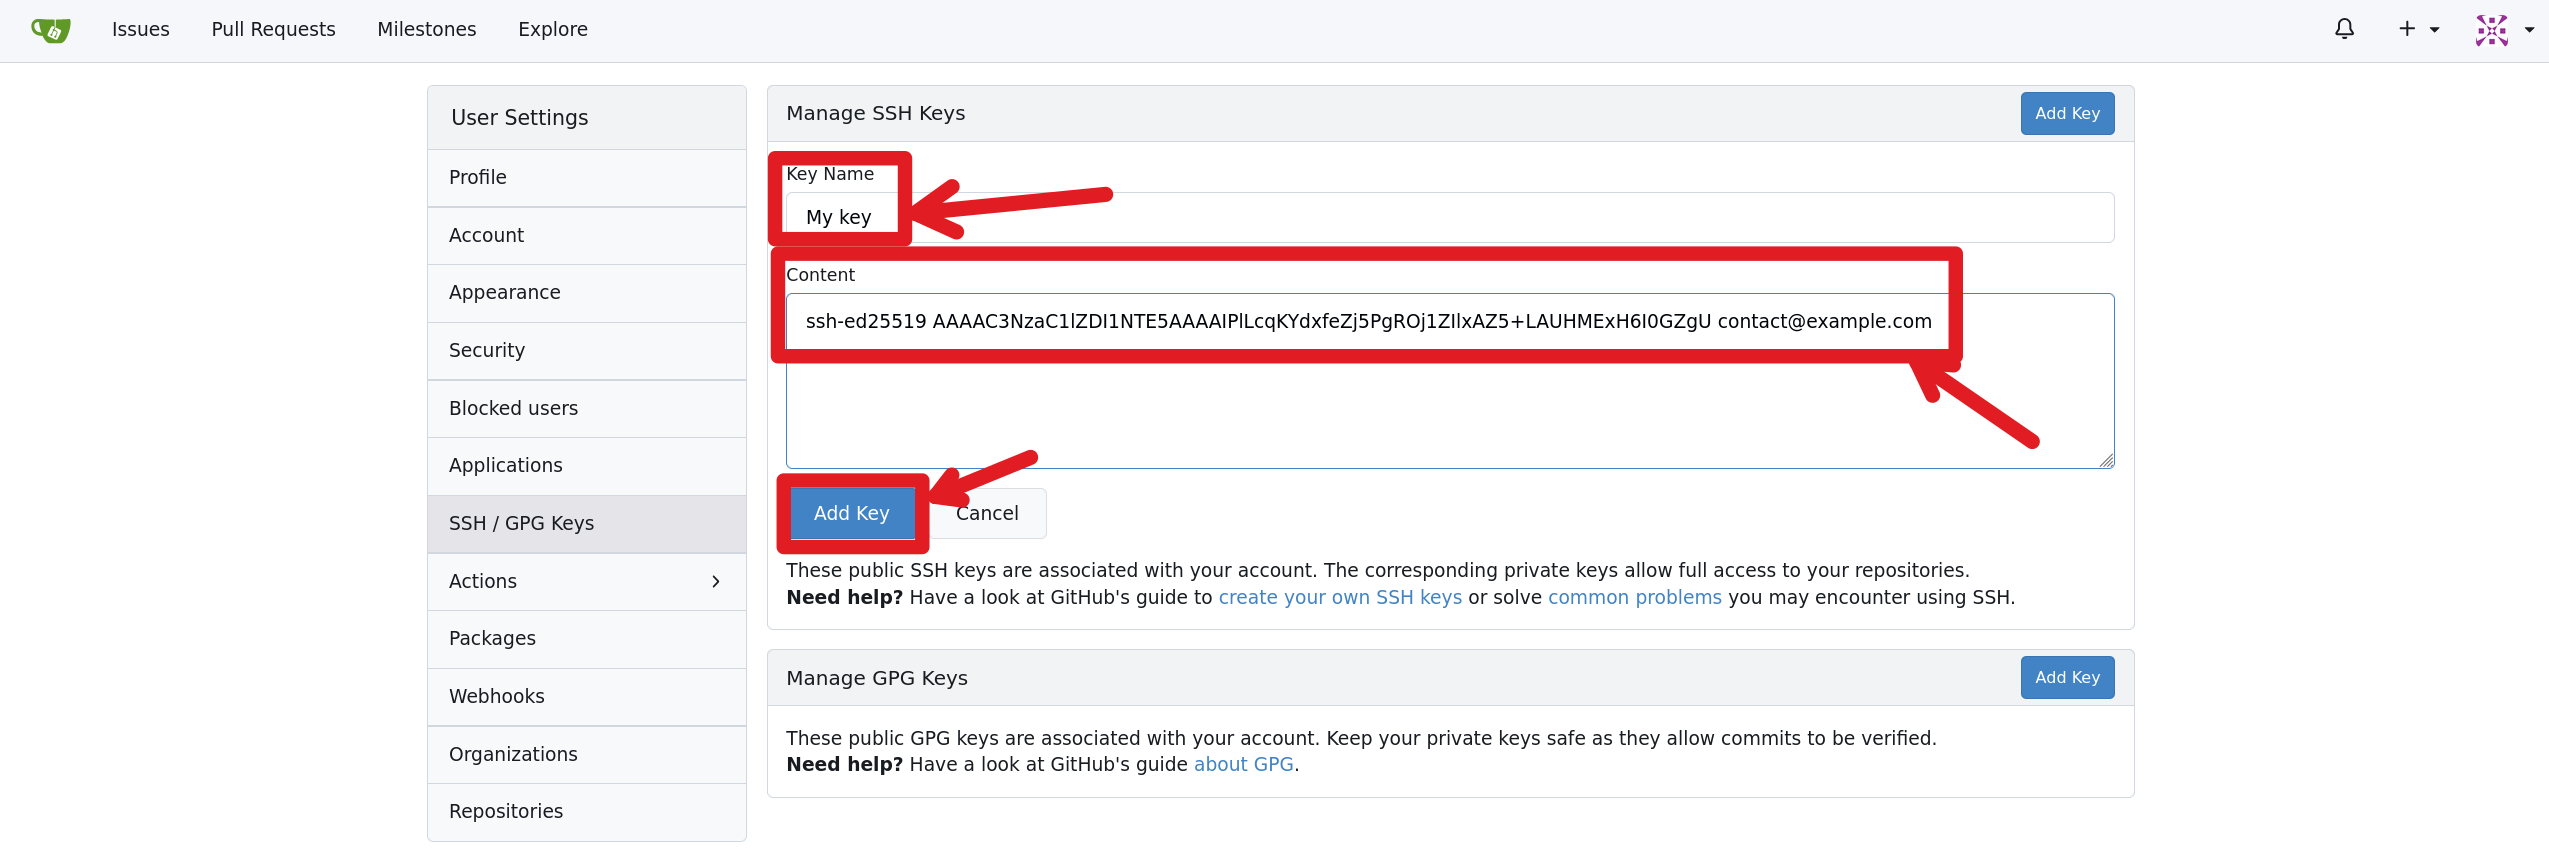
You should see a success screen similar to the one below.
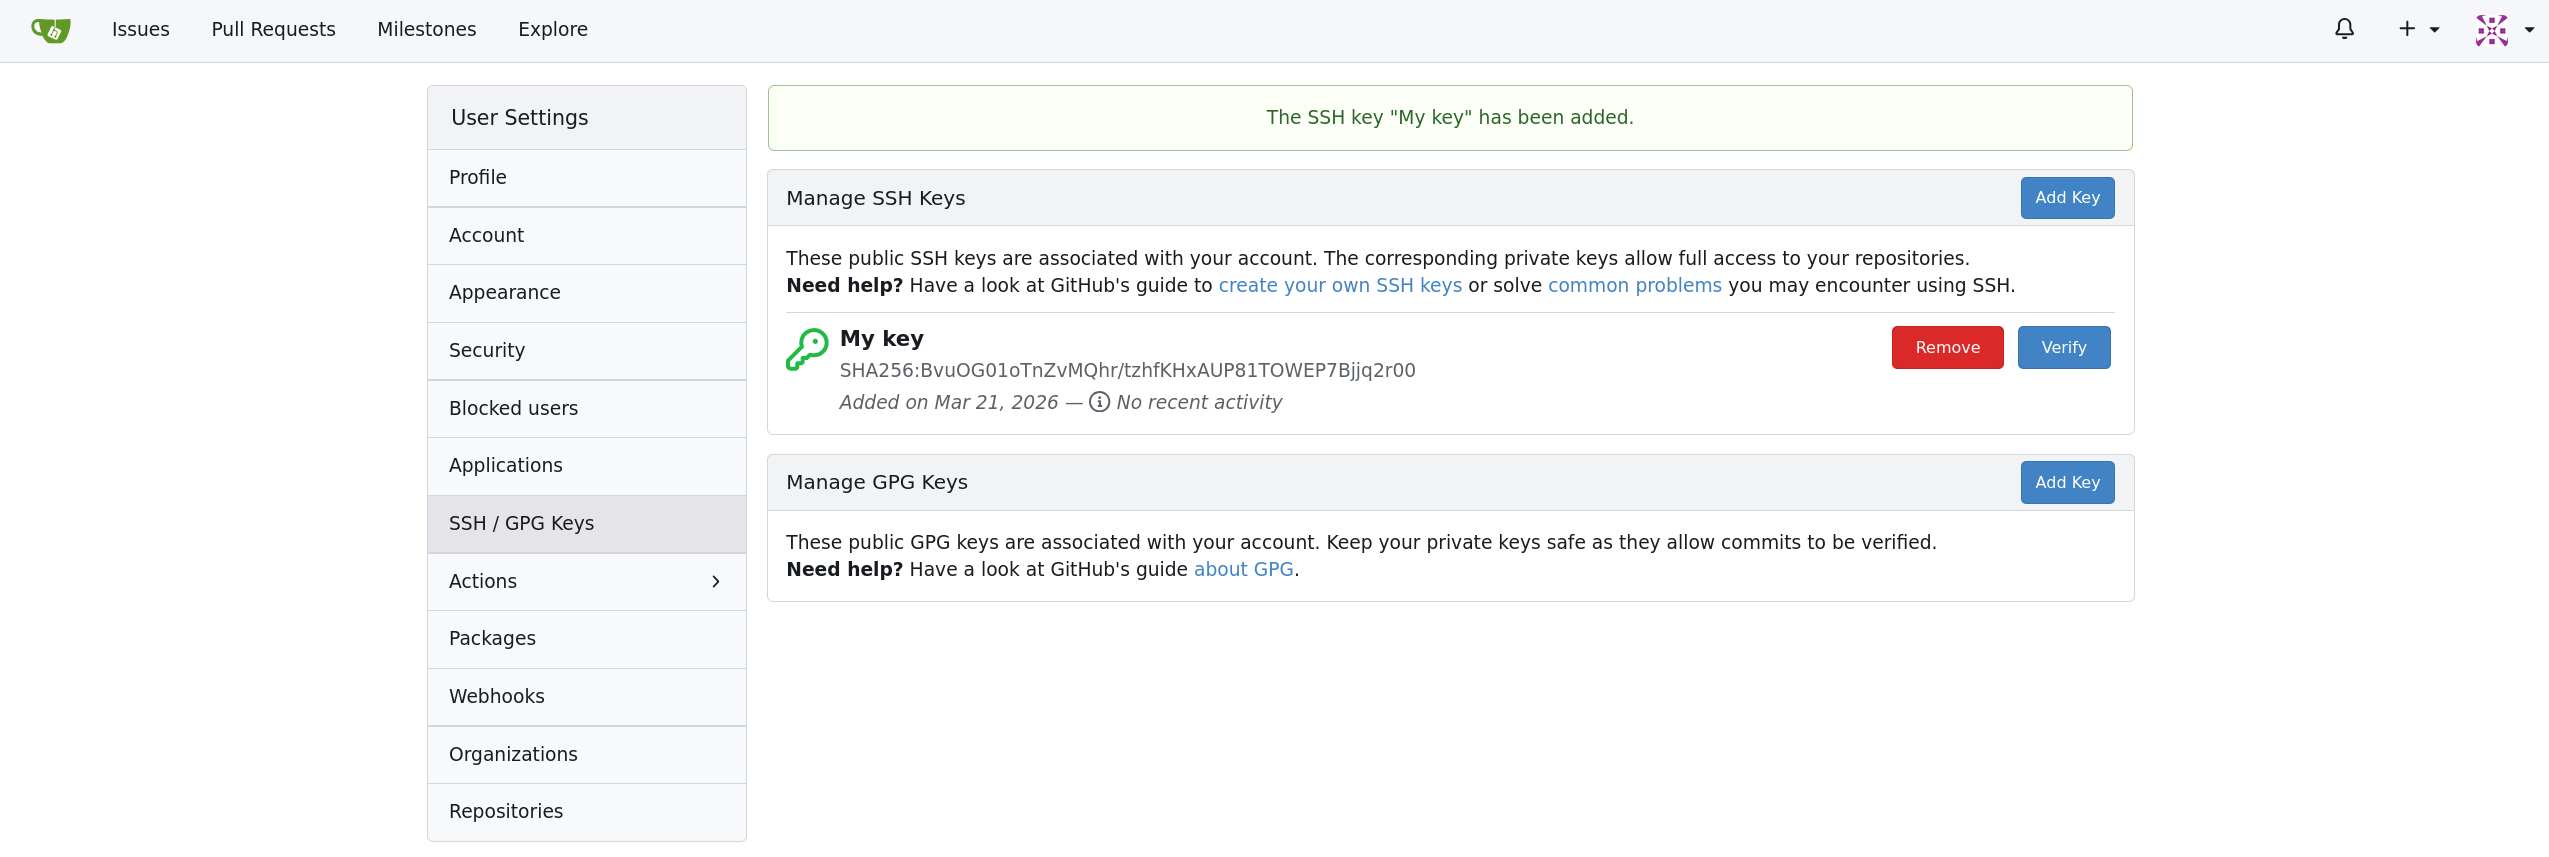
The SSH key is now added to your Gitea account and can be used to authenticate.
(Optional) If you did not save the key to the default location (
~/.ssh/id_ed25519), you may need to add it to your SSH configuration. You can do this by adding the following lines to your~/.ssh/configfile (create the file if it doesn't exist):Host git.conquerhack.ch HostName git.conquerhack.ch User git IdentityFile ~/.ssh/your_key_file Port 2222Replace
your_key_filewith the name of your private key file (without the.pubextension).
Getting the URL of your team's repository
First, let's find the URL of your team's repository.
Navigate to the ConquerHack Gitea instance.
Log in with your Gitea account. If you do not have one yet, wait for us to create it for you and send you the credentials, or tell us if you think you should have received credentials but haven't.
Navigate to the ConquerHack Organization.
Under
Repositories, you should see one repo whose name starts withteam-. This is your team's repository. Click on it.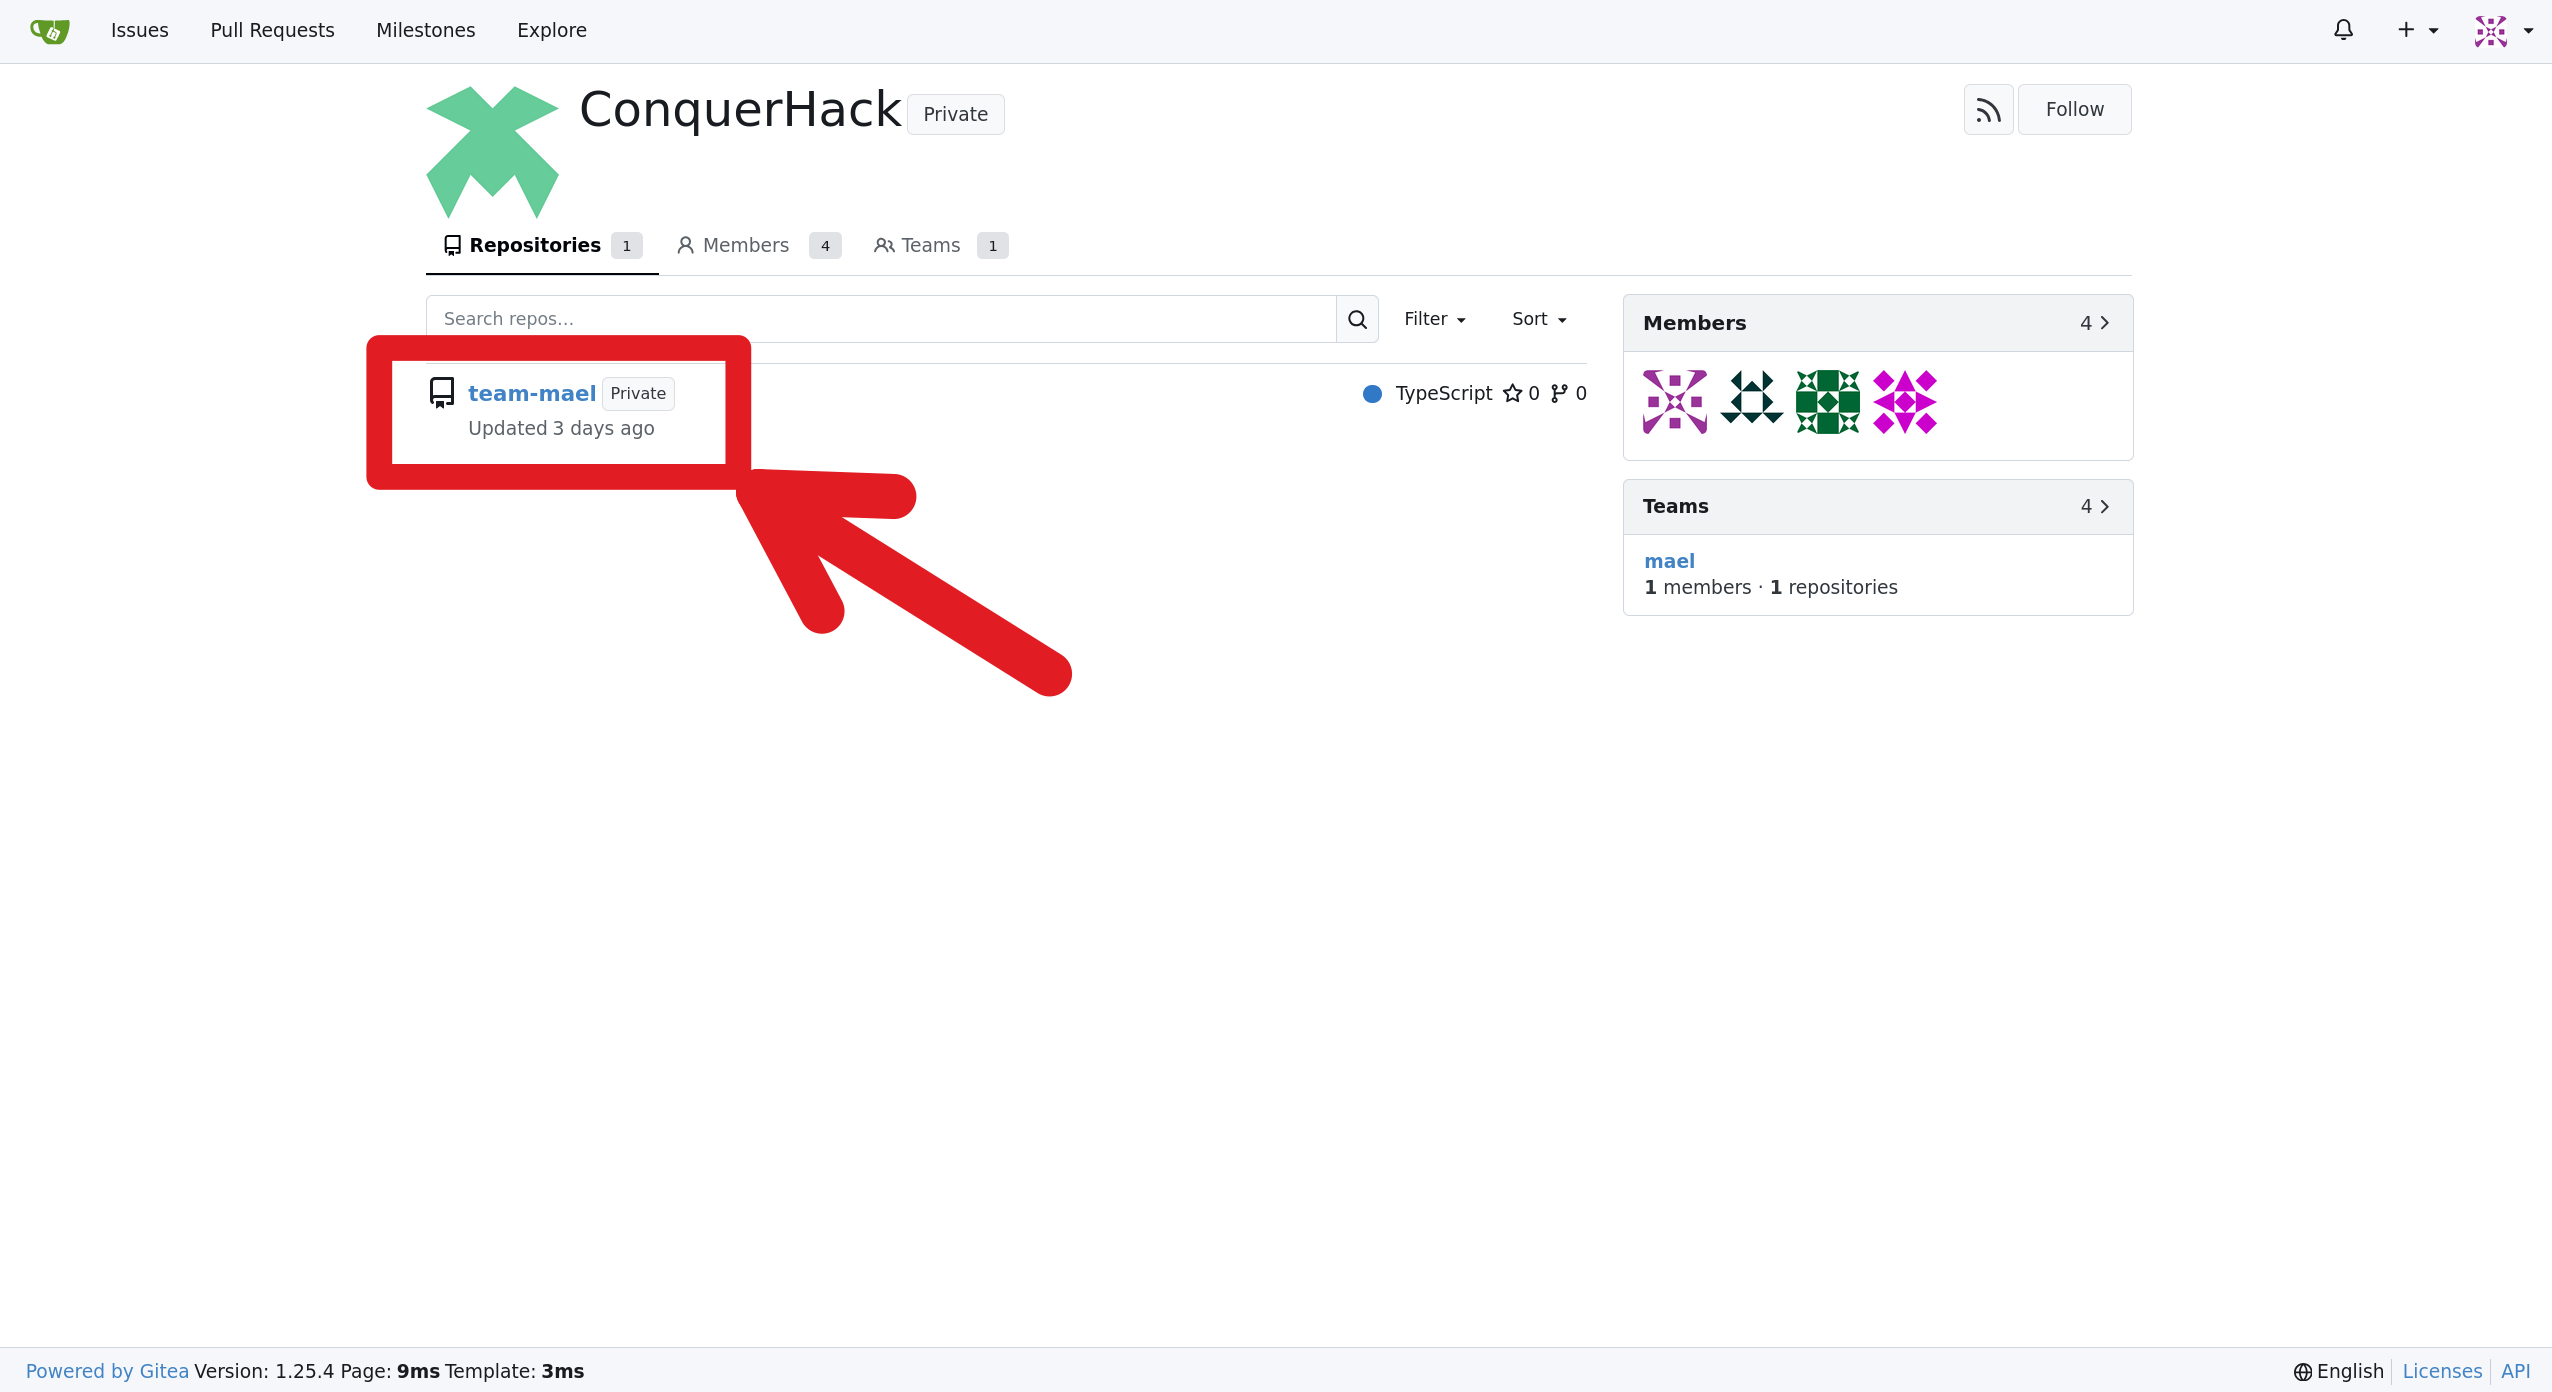
On the repository page, click on the
Codebutton and copy the URL underSSH.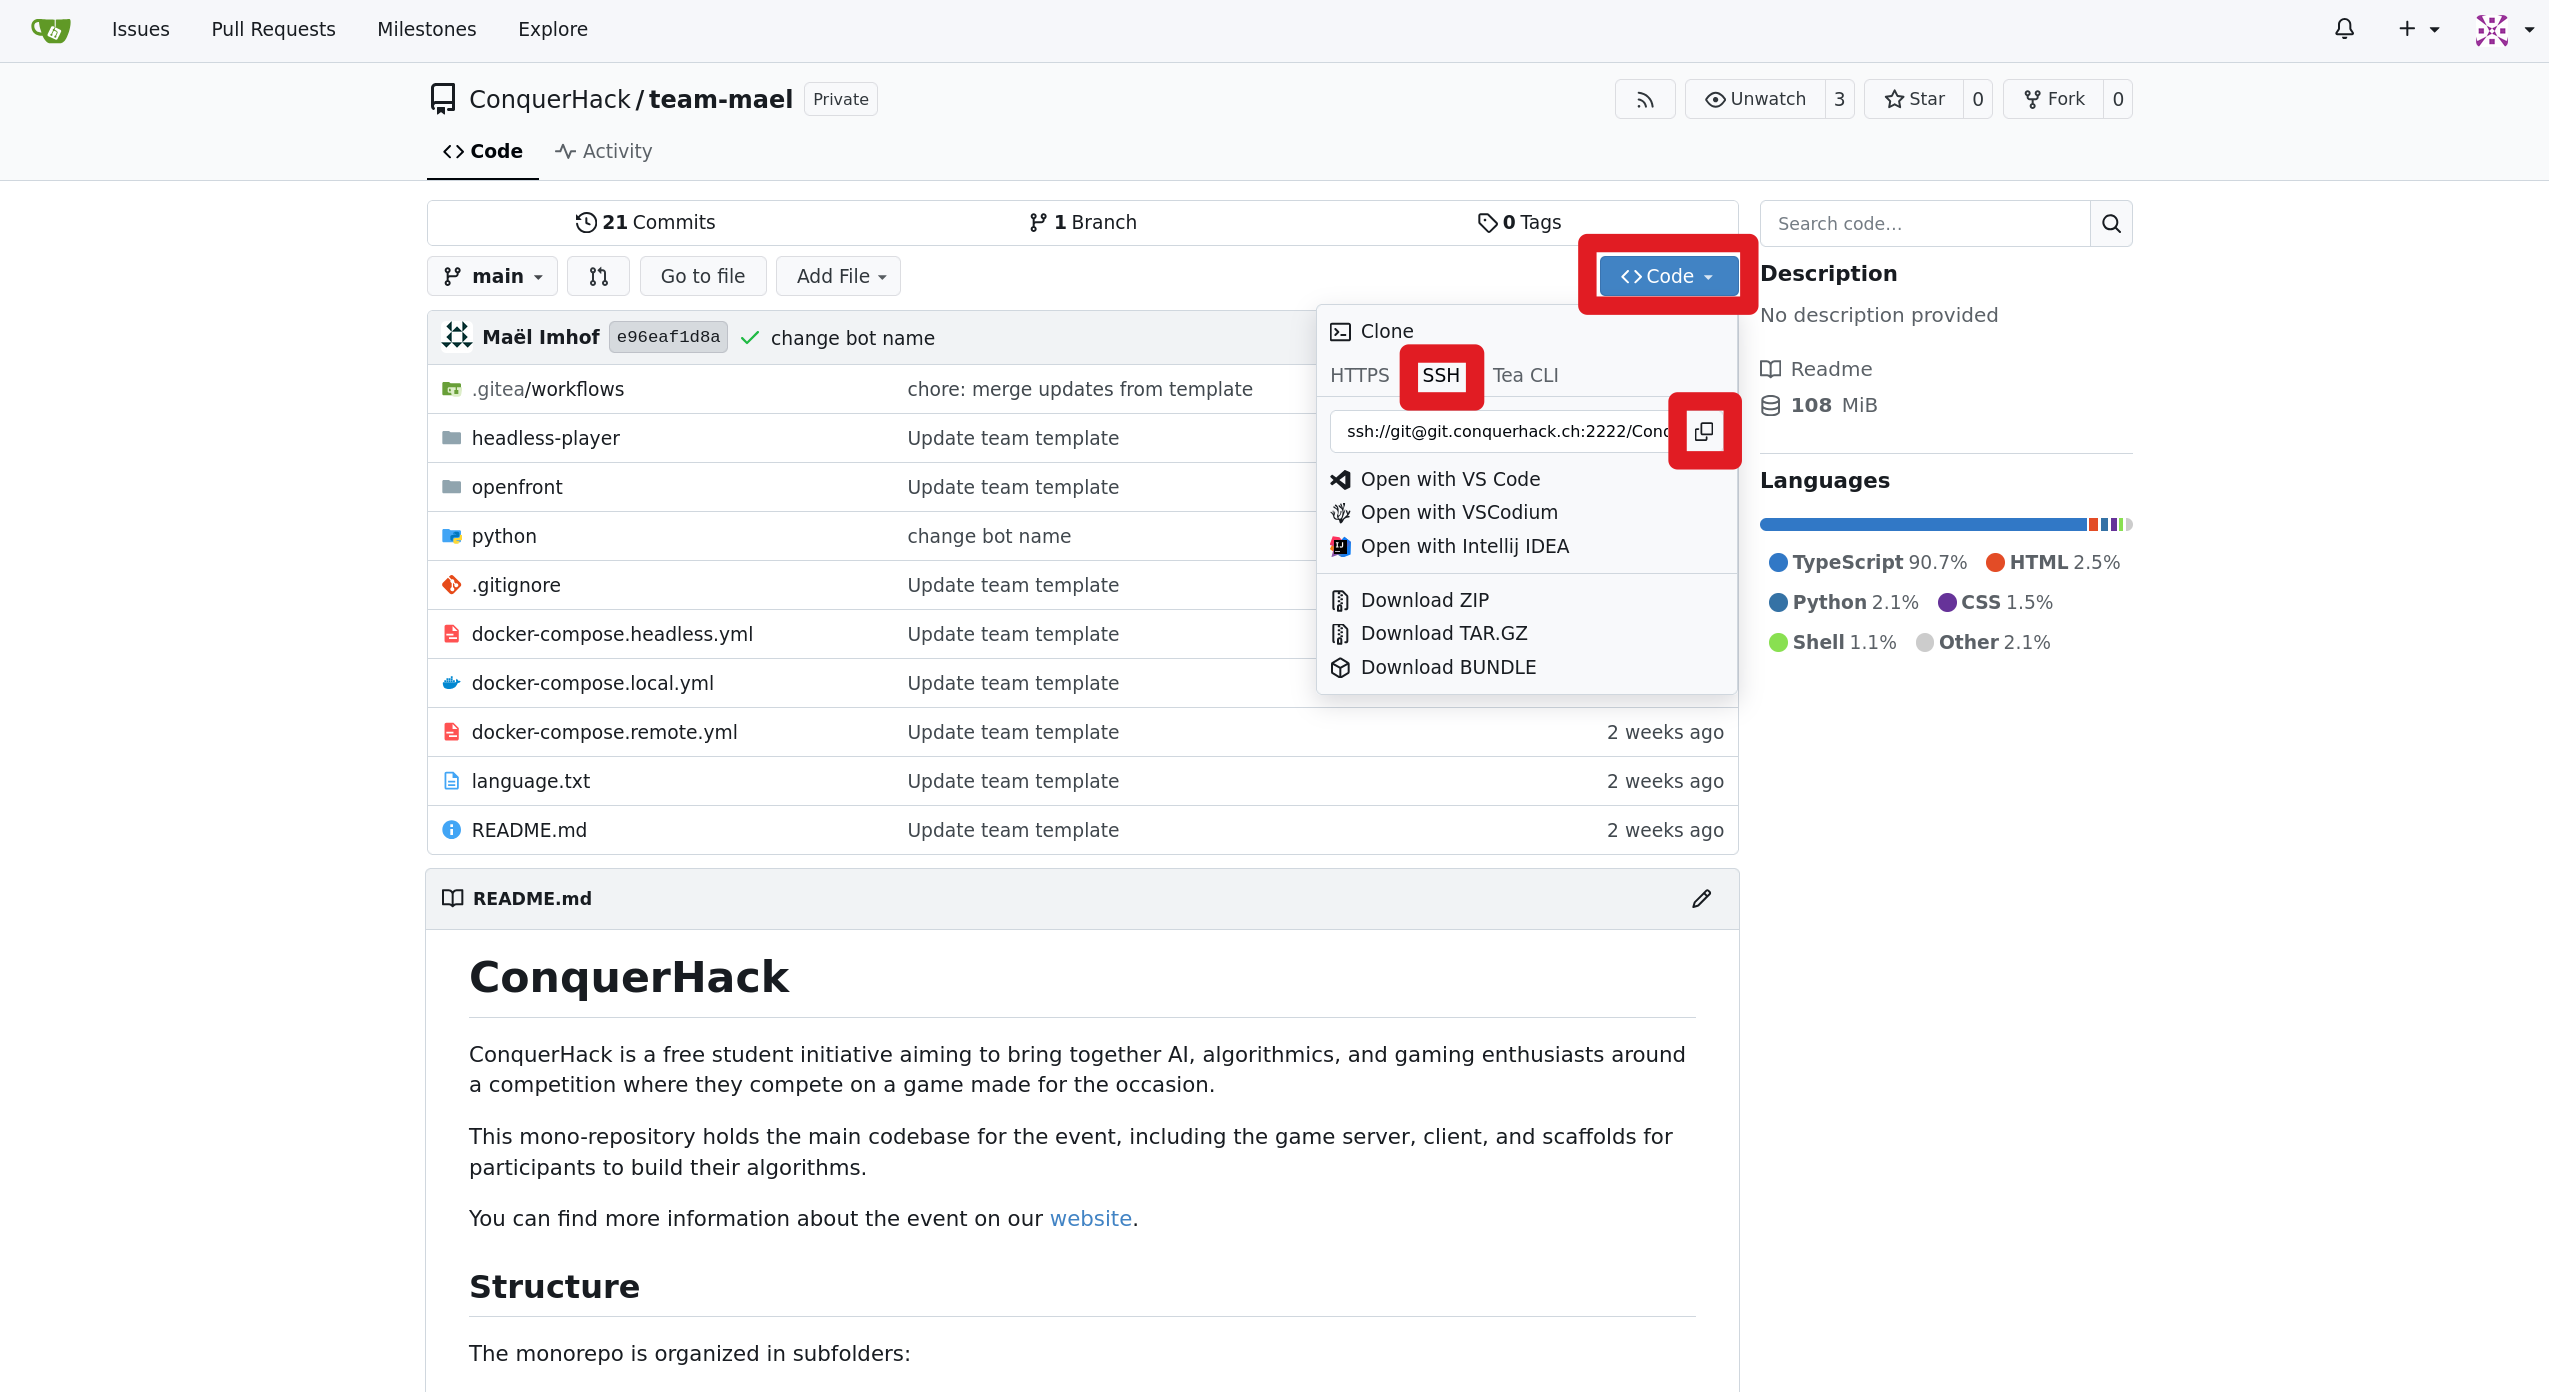
We will refer to this URL as <repo-url> in the next steps. We also refer to it as ssh://git@git.conquerhack.ch:2222/ConquerHack/<team-name>.git, where <team-name> is the name of your team, or simple your team's repository URL.
Cloning the repository
Now that you have the URL of your team's repository, you can clone it to your local machine.
Open a terminal and navigate to the directory where you want to clone the repository. For example, you can run:
bashcd ~/projectsRun the following command to clone the repository (replace
<repo-url>with the URL you copied in the previous step):bashgit clone <repo-url>This will create a new directory with the name of your team's repository (e.g.
team-1) and clone the contents of the repository into it.Navigate into the cloned repository:
bashcd team-1
Congratulations! You have successfully cloned your team's repository. You can now start working on your bot by opening the project in your preferred IDE and tinkering with the code.
As a next step, we recommend you to read the provided guides. They are meant to direct your efforts in the right direction and show you what is possible to do with the bot. You can also check out the API reference to see all the available methods and classes you can use in your bot.